[Struts2] 스트럿츠2 + iBatis 파일업로드/다운로드/보기 기능

스트럿츠 2에 iBatis 파일 업로드 다운로드 보기 기능 구현
DB를 이용하지 않고 클라이언트 창에서 서버에 파일을 업로드하는 방법을 할 것이다.
파일로부터 정보를 추출해서 info정보를 DB에 넣어주면 된다.
일단은 스트럿츠 2로 파일 업로드하는 방법만 익힐 것이다.
그동안 사용했던 com.util.sqlMap은 필요 없다. 이유는
이 방법은 아이 바티스 db연동을 안 한다
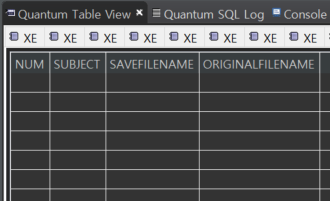
num 파일 번호 기본키
subject 제목
savefilename 서버에 저장된 파일명
originalfilename 클라이언트가 올린 파일명
FileTestDTO 생성
package com.fileTest;

import java.io.File;

public class FileTestDTO {

	private File upload;  // jsp페이지의 input태그의 type=file, name=upload 인 데이터

	// 위에서 정의한 upload에 FileName문자를 붙여서 변수를 만들면
	// struts2가 자동으로 파일의 이름을 넣어준다.
	// upload + FileName
	private String uploadFileName;  // struts2방식 File클래스 이름뒤에 FileName을 붙인다.

	private String mode; // 화면구분자


	public File getUpload() {
		return upload;
	}

	public void setUpload(File upload) {
		this.upload = upload;
	}

	public String getUploadFileName() {
		return uploadFileName;
	}

	public void setUploadFileName(String uploadFileName) {
		this.uploadFileName = uploadFileName;
	}

	public String getMode() {
		return mode;
	}

	public void setMode(String mode) {
		this.mode = mode;
	}

}
struts-fileTest.xml 생성 후 struts.xml 에 추가해줘야 한다.
struts.xml
<?xml version="1.0" encoding="UTF-8"?>
<!DOCTYPE struts
PUBLIC "-//Apache Software Foundation//DTD Struts Configuration 2.0//EN"
"http://struts.apache.org/dtds/struts-2.0.dtd">
<!--  struts-default  : xml 파일을 불러옴  -->
<!--  include : 또 다른 환경설정을 불러옴 -->
<struts>
	<package name="default" extends="struts-default" namespace="">
		<global-results>
			<result name="error">/exception/error.jsp</result>
		</global-results>
	</package>
	<include file="struts-test.xml"/>
	<include file="struts-board.xml"/>
	<include file="struts-fileTest.xml"/>
</struts>
<include file="sturts-fileTest.xml"/> 추가해줬다.
struts-fileTest.xml (Controller 역할)
<?xml version="1.0" encoding="UTF-8"?>
<!DOCTYPE struts
PUBLIC "-//Apache Software Foundation//DTD Struts Configuration 2.0//EN"
"http://struts.apache.org/dtds/struts-2.0.dtd">

<struts>

	<!-- extends="default"는 struts.xml의 package name과 같아야한다.-->

	<package name="fileTest" extends="default" namespace="/fileTest">
		<!-- fileTest/created 오면 FileTestAction 에서 created메소드를 찾아서 결과값에 따라 jsp이동   -->
		<action name="created" class="com.fileTest.FileTestAction" method="created">
			<result name="input">/fileTest/write.jsp</result>
			<result name="success">/fileTest/view.jsp</result>
		</action>

		<action name="download" class="com.fileTest.FileTestAction" method="download">
			<!-- 돌아오는값이 없으므로 안적어도됨  -->
		</action>

		<action name="down" class="com.fileTest.FileTestAction" method="down">
			<!-- 돌아오는 stream 을 이런형식으로 읽어낸다.  -->
			<result name="success" type="stream">
				<param name="inputName">inputStream</param>
				<param name="contentType">application/octet-stream</param>
				<param name="contentDisposition">fileName=${originalFileName}</param>
				<param name="bufferSize">1000000</param>
			</result>
		</action>
	</package>
</struts>
주소창에 /fileTest/created 오면 FileTestAction에서 created메서드를 찾아서
결괏값에 따라 해당하는 jsp이동시킨다.(데이터도 넘겨준다)
struts.properties
struts.i18n.encoding=UTF-8
struts.action.extention=action
struts.multipart.saveDir=c:\\temp
struts.multipart.maxSize=10000000
struts.configuration.files=struts-default.xml,struts.xml
struts.multipart.maxSize=10000000 추가한다
파일을 업로드하면서 최대 크기 용량 10메가까지 지정할 수 있다.
파일을 업로드하기 위해서는
기존에 사용했던 FileManager.java를 복사해서 고칠 것이다.
FileManager 클래스 - 업로드 , 다운로드 기능
package com.util;

import java.io.BufferedInputStream;
import java.io.File;
import java.io.FileInputStream;
import java.io.FileOutputStream;
import java.io.IOException;
import java.io.OutputStream;
import java.util.Calendar;

import javax.servlet.http.HttpServletResponse;


// 스트럿츠로2 파일업로드

public class FileManager {

	// 스트럿츠2 여기다가 파일업로드 만들것


					// 파일이 이름이 들어옴
	public static String doFileUpload(File file,String originalFileName , String path) throws IOException { // 어떤파일을 업로드할지 , 어이다가 경로

		// upload 에 a.txt가 오면
		// a.txt 에서 txt를 빼내고
		// 파일명과 상관없이 20220310115020xxxxx 에 .txt를 붙일것이다
		// 새롭게 저장되는 saveFileName이다
		// 반환값으로 받아내야만 오리지널 파일네임과 세이브파일네임을 db에 저장하게된다.
		// 그래서 반환값이 String이다.

		String newFileName = null;

		if(file==null) {
			return null;
		}


		if(originalFileName.equals("")) {
			return null;
		}

		// 확장자 추출 뺴뇌야만 나중에 붙일수있으니
		// abc.txt 뒤에서부터 .를 찾아서 끝까지 ( 인수의 개수가 하나면 끝까지)
		String fileExt = originalFileName.substring(originalFileName.lastIndexOf(".")); // 맨뒤의 인덱스부터 . 까지 txt

		if(fileExt==null || fileExt.equals("")) {
			return null;
		}

		// 서버에 저장할 새로운 파일 이름 생성
									// 월 분 일 시 분 초
		// 1딸라 : 캘린더 겟 인스턴스 하나로 값을 싹다 받으려고

		//서버에 저장할 새로운 파일이름 생성
				newFileName = String.format("%1$tY%1$tm%1$td%1$tH%1$tM%1$tS",
						Calendar.getInstance());
				newFileName += System.nanoTime();  // 절대중복되지않음 10의-9승값
				newFileName += fileExt; // 확장자를 붙이면 업로드할 새로운 파일이름이 만들어짐

		// 파일업로드
		File f = new File(path);

		if(!f.exists()) {
			f.mkdirs();
		}

		// 풀 파일까지 포함된 경로
		String fullFilePath = path + File.separator + newFileName;


		// -------------파일 업로드 소스코드--------------
		// 업로드할 파일을 읽어옴 (서블릿의 파일업로드와 똑같음)
		FileInputStream fis = new FileInputStream(file);

		// 파일을 내보내는애
		FileOutputStream fos = new FileOutputStream(fullFilePath);


		int data = 0;
		byte[] buffer = new byte[1024];

		// 읽어온 fis내용을 가져온다.
		while((data=fis.read(buffer, 0, 1024))!=-1) {

			fos.write(buffer,0,data);
		}

		fos.close();
		fis.close();

		return newFileName;
	}

	// db에 있는거 삭제는 dao

	// 파일다운로드

	// 다운로드는 서버에서 클라이언트로 response담아서 준다.
	// 다운로드는 response가 필수이다.


    // 파일다운로드
    //saveFileName : 서버의 저장된 파일이름
    //originalFileName : 클라이언트가 업로드한 파일명
    //path : 서버에 저장된 경로

	// response , 파일 저장이름 , 오리지널파일이름 ,  경로 매개변수로 받는다.
	public static boolean doFileDownload(HttpServletResponse response,
			String saveFileName, String originalFileName,String path) {
		// a.txt를 올렸는데 a.txt로 저장되는데 b라는사람이 a.txt 올리게되면 a1.txt로저장
		// a1이라는 이름으로 다운받을때 a1를 a.txt로 바꿔준다(오리지널파일네임).
		// 그래서 오리지널 파일이름이 필요

		try {
			// 오리지널 파일이 없는경우 저장이름으로 넣음

			String filePath = path + File.separator + saveFileName;


			if(originalFileName==null || originalFileName.equals("")) {

				originalFileName = saveFileName; // cat.jpg

			}
			// 파일을 다운받아 클라이언트 컴에 저장할때
			// 파일 한글 이름 깨짐 방지 ( 반드시 써야한다. 한글파일을 받음 )
			// 한글2바이트 영문 1바이트 웹에서는 한글을 3바이트로 쓰려고 UTF-8로씀
			// ISO 생략가능 8859_1 만 써도 된다.

			originalFileName =
					new String(originalFileName.getBytes("euc-kr"),"ISO-8859-1");


			File f = new File(filePath); // 파일이 존재하면 파일을 다운받음 , 없으면 자바스크립트로 에러 출력

			// 존재하지않으면 false
			if(!f.exists()) {
				return false;
			}

			//  html 를 utf-8로 처리한다고 알려줬었음
			// application : 모든 프로그램에서 돌아감
			//  abc.txt 앞에있는건 특수기호 아니면 모두다 가능 뒤에는 3자리
			// .를 octet라고 부름 , 모든파일은 application서 만들고 octet라고 구분지음
			// 형식
			response.setContentType("application/octet-stream");


			// 내려보냄
			// 서버가 파일을 read 읽어서 내보낼때 out를 쓴다.

			// setHeader(String name, String value) : name 헤더의 값을 value로 지정한다.
			// 데이터형식/성향설정 (attachment: 첨부파일)
			response.setHeader("Content-disposition",
					"attachment;fileName=" + originalFileName);

			// 사진1
			// 버퍼로 객체를 생성할 때 데이터를 읽어올 파일을 지정
			BufferedInputStream bis = new BufferedInputStream(new FileInputStream(f));

			// 버퍼의 출력스트림을 출력
			OutputStream out = response.getOutputStream();


			int data;
			byte[] bytes = new byte[4096];// 자동으로 내보내줌


			// 4096 바이트로 읽어와서 없을때까지 읽어옴
			// 사진2
			// bytes의 0번째부터 4096번째 까지 읽어와서

			while((data=bis.read(bytes, 0, 4096))!=-1) {
				out.write(bytes,0,data);// 0부터 data의 양만큼
			}
			out.flush();
			out.close();
			bis.close();

		} catch (Exception e) {
			System.out.println(e.toString());
			// 에러가 났으면 false
			return false;
		}
		return true;
	}


	// 파일을 삭제하는 메소드~~~~~~~~~~~~~
	public static void doFileDelete(String fileName,String path) {
		//---------------중요  파일삭제할때 파일이름,파일경로 필요 --------------------
		try {
			// path는 서블릿의 파일저장경로 path를 넘겨줄건데
			// 파일의 이름은 db에 있다
			// 그리고 업로드된 파일 삭제하고 db정보도 삭제해야한다.

			String filePath = path + File.separator + fileName; // 풀네임
			File f = new File(filePath); // 경로를 넘겨줌

			// 파일이 있으면 지워라 - 물리적인 파일삭제
			if(f.exists()) {
				f.delete();
			}
		} catch (Exception e) {
			System.out.println(e.toString());

		}
	}
}
파일업로드 페이지 - write.jsp
<%@ page contentType="text/html; charset=UTF-8"%>
<%@ taglib prefix="c" uri="http://java.sun.com/jsp/jstl/core" %>
<%
	request.setCharacterEncoding("UTF-8");
	String cp = request.getContextPath();
%>
<!DOCTYPE html PUBLIC "-//W3C//DTD HTML 4.01 Transitional//EN" "http://www.w3.org/TR/html4/loose.dtd">
<html>
<head>
<meta http-equiv="Content-Type" content="text/html; charset=UTF-8">
<title>Insert title here</title>
</head>
<body>

<form action="<%=cp%>/fileTest/created.action" method="post"
enctype="multipart/form-data">

<!-- dto 의 이름과 같아야 한다.  -->
<!-- submit 누르면 action 경로로 찾아간다. -->
파일: <input type="file" name="upload"/><br/>
<input type="hidden" name="mode" value="save"/>
<input type="submit" value="파일업로드"/>

</form>

</body>
</html>
파일을 입력할 때는 <input type="file" name="upload"/>
form enctype="multipart/form-data"를 적어줘야 한다.
파일 업로드 버튼을 누르면 submit을 통해 action에 있는 "<%=cp%>/fileTest/created.action"로 이동한다.
파일 다운로드 / 조회 페이지 - view.jsp
파일 업로드 후 파일 다운로드 , 파일 보기를 할 수 있는 페이지입니다.
<%@ page contentType="text/html; charset=UTF-8"%>
<%@ taglib prefix="c" uri="http://java.sun.com/jsp/jstl/core" %>
<%
	request.setCharacterEncoding("UTF-8");
	String cp = request.getContextPath();
%>
<!DOCTYPE html PUBLIC "-//W3C//DTD HTML 4.01 Transitional//EN" "http://www.w3.org/TR/html4/loose.dtd">
<html>
<head>
<meta http-equiv="Content-Type" content="text/html; charset=UTF-8">
<title>Insert title here</title>
</head>
<body>

<!-- 클릭했을때 download() 로 처리하게끔 null 로 와서 아무작업도 안하게 함
 saveFilename 과 originalfilename을 가지고 가게 된다.-->
파일 다운로드<br/>
<a href="<%=cp%>/fileTest/download.action?saveFileName=${saveFileName}
&originalFileName=${originalFileName}">${originalFileName}</a><br/>

<br/>

파일보기<br/>
<a href="<%=cp%>/fileTest/down.action?saveFileName=${saveFileName}
&originalFileName=${originalFileName}">${originalFileName}</a><br/>


</body>
</html>
FileTestAction.java
파일 업로드 입력 , 파일 다운로드 , 파일내용 보기 , 파일 보기 , db저장용
package com.fileTest;

import java.io.File;
import java.io.FileInputStream;
import java.io.InputStream;

import javax.servlet.http.HttpServletRequest;
import javax.servlet.http.HttpServletResponse;
import javax.servlet.http.HttpSession;

import org.apache.struts2.ServletActionContext;

import com.opensymphony.xwork2.ActionSupport;
import com.opensymphony.xwork2.ModelDriven;
import com.opensymphony.xwork2.Preparable;
import com.util.FileManager;

public class FileTestAction extends ActionSupport
	implements Preparable , ModelDriven<FileTestDTO>{

	private static final long serialVersionUID = 1L;

	private FileTestDTO dto;


	public FileTestDTO getDto() {
		return dto;
	}

	@Override
	public FileTestDTO getModel() {
		return dto;
	}

	@Override
	public void prepare() throws Exception {

		dto = new FileTestDTO();

	}

	// 파일업로드 입력
	public String created() throws Exception { // 파일 업로드

		if(dto==null||dto.getMode()==null||dto.getMode().equals("")) {
			return INPUT;
		}

		// dto 값이 있으면
		HttpServletRequest request = ServletActionContext.getRequest();
		HttpSession session = request.getSession();

		// 경로 구함
		String root = session.getServletContext().getRealPath("/"); // 최상의 루트
		String savePath = root + "pds" + File.separator + "data"; // 저장경로

		// db에 넣을 saveFileName
		// doFileUpload(File file,String originalFileName , String path)


        // 업로드한 saveFileName 과 originalFileName 이 들어오면 밑에 변수에 자동으로 들어온다
        saveFileName =
				FileManager
				.doFileUpload(dto.getUpload(), dto.getUploadFileName(), savePath);
                // (dto에있는upload를줌, dto에 uploadFileName ,  저장경로)

		// db에 넣을 오리지널파일이름(링크할때필요)
		originalFileName = dto.getUploadFileName();

		return SUCCESS;
	}

	// 파일 다운로드
	public String download() throws Exception { // 파일 다운로드


		// dto 값이 있으면
		HttpServletRequest request = ServletActionContext.getRequest();
		HttpServletResponse response = ServletActionContext.getResponse();

		HttpSession session = request.getSession();

		// 경로 구함
		String root = session.getServletContext().getRealPath("/"); // 최상의 루트
		String savePath = root + "pds" + File.separator + "data"; // 저장경로


        // boolean doFileDownload(HttpServletResponse response,
		//    String saveFileName, String originalFileName,String path)


        FileManager.doFileDownload(response, saveFileName,
				originalFileName, savePath);


		return null; // 다운로드는 되돌러주는 값이 없다
	}

	// 파일 내용 보기
	public String down() throws Exception { // 파일 보기


		// dto 값이 있으면
		HttpServletRequest request = ServletActionContext.getRequest();

		HttpSession session = request.getSession();

		// 경로 구함
		String root = session.getServletContext().getRealPath("/"); // 최상의 루트
		String savePath = root + "pds" + File.separator + "data"; // 저장경로


		originalFileName = new String(originalFileName.getBytes("euc-kr"),"8859_1"); // 파일볼때 깨지지않기 위함

		String fullFileName = savePath + File.separator + saveFileName;

		// 다운을 하는게 아니라 읽어내야 한다.
		inputStream = new FileInputStream(fullFileName);

		return SUCCESS;
	}

	// 파일 보기
	private InputStream inputStream;  // 화일의 내용을 클릭하면 그 아래한글(프로그램)을 읽어들어서 열어서 볼수있게끔


	// db저장용
	private String saveFileName;
	private String originalFileName;


	public InputStream getInputStream() {
		return inputStream;
	}

	public void setInputStream(InputStream inputStream) {
		this.inputStream = inputStream;
	}

	public String getSaveFileName() {
		return saveFileName;
	}

	public void setSaveFileName(String saveFileName) {
		this.saveFileName = saveFileName;
	}

	public String getOriginalFileName() {
		return originalFileName;
	}

	public void setOriginalFileName(String originalFileName) {
		this.originalFileName = originalFileName;
	}


}
down 메소드 : 파일을 다운로드 받지 않고 조회하는 기능
다운로드 시 FileManager.doFileDownload(response, saveFileName, originalFileName, savePath)
업로드한 saveFileName과 originalFileName 이 들어오면 밑에 변수에 자동으로 들어온다
파일 다운로드할 때 변수로 불러올 수 있다.
변수에 대입시켰다.
private String saveFileName;
private String originalFileName;
다운로드는 되돌려주는 값이 없으므로 null
실행결과


밑에 주소가 보이는 것을 알 수 있다.
saveFileName 서버에 저장된 파일 이름
originalFileName 클라이언트가 서버에 저장된 파일 이름

C:\Java\work\. metadata\. plugins\org.eclipse.wst.server.core\tmp0\wtpwebapps\struts2\pds\data
경로에 가보면 업로드한 파일이 생긴 걸 볼 수 있다.